STEP 1 CONFIGURE
PHONE FORWARDING SETUP
Connect your phone system so incoming calls route correctly into your automation workflows. Configure the flow from your business number through our system to your mobile device.
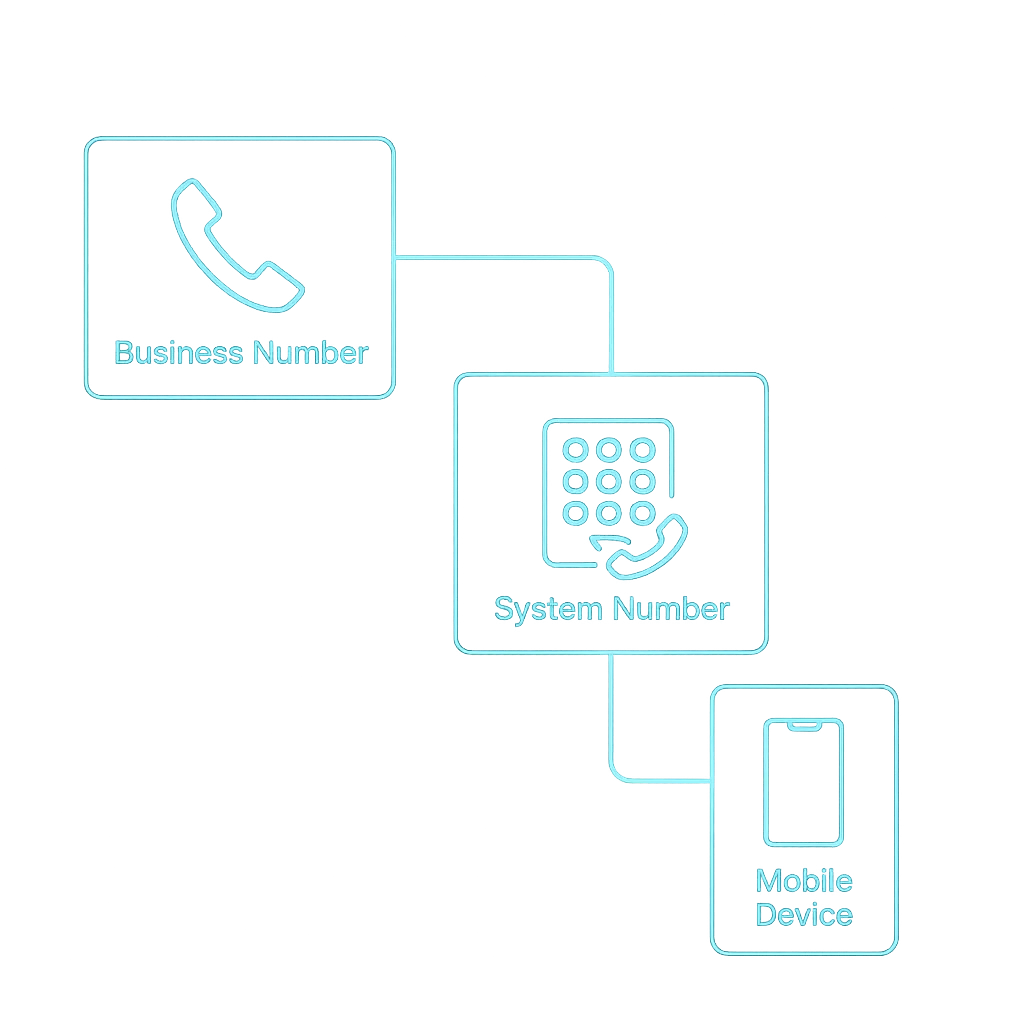
NODE ARCHITECTURE
System Routing Overview
Business Phone Number
This is the primary number your customers call to reach your business.
System Number
Calls route automatically into your automation system for tracking and logic processing.
Mobile Phone
Calls forward instantly to your designated mobile device, ensuring no missed connections.
Configuration Steps
01
ACCESS SETTINGS
Access your phone carrier forwarding settings.
02
SYSTEM NUMBER
Enter the system number provided during your onboarding setup.
03
ENABLE FORWARDING
Enable call forwarding.
04
SAVE SETTINGS
Save and apply settings.
STEP 1 VALIDATION
System Test Checklist
Ensure your phone system is fully operational before moving forward. Use this diagnostic checklist to verify that incoming calls properly reach your automation workflows and forward to your mobile device as expected.
STEP 2 CAPABILITIES
Text Messaging Configuration
Activate powerful messaging features so your system can communicate instantly with customers and capture every opportunity.
Missed Call Text Back
Instantly re-engage prospects when you are unavailable. The system detects the missed call and immediately fires a customizable text message to secure the lead before they move on.
- Instant automated response
- Customizable message delay
- Secures lost opportunities


Lead Follow-Up Messages
Keep the conversation moving forward automatically. Trigger perfectly timed sequences that nurture your contacts without manual intervention, driving higher conversion rates.
- Multi-step automated sequences
- Condition-based message routing
- High open and response rates
SYSTEM CONFIGURATION
Messaging Setup Steps
Follow these methodical steps to activate messaging capabilities, then use the diagnostic checklist below to confirm system routing and delivery.
MESSAGING TEST
- Send test message
- Confirm delivery
- Reply to message
- Confirm response received
01
Verify your messaging number is assigned and active.
02
Confirm messaging settings are active.
03
Send test message.
04
Confirm successful delivery.
STEP 3 OVERVIEW
Email System Benefits
Connect your email domain to guarantee high deliverability, establish authority, and protect your automated communication sequences from aggressive spam filters.
IMPROVED DELIVERY
Ensure your critical communications and automated follow-ups reach the primary inbox instantly.
REDUCED FILTERING
Bypass aggressive spam filters and blocklists by establishing a verified, authenticated domain connection.
PROFESSIONAL IDENTITY
Send from your branded domain to build immediate trust and corporate authority with every message.
RELIABLE COMMUNICATION
Maintain consistent connection uptime and uncompromised message integrity across your entire automation framework.
Email Configuration Steps
[ STEP 01 ]
ADD YOUR SENDING DOMAIN
[ STEP 02 ]
ADD REQUIRED DNS RECORDS
[ STEP 03 ]
VERIFY DOMAIN CONNECTION
[ STEP 04 ]
ENABLE EMAIL SENDING
> SYSTEM_DIAGNOSTIC: EMAIL_TEST
- Send test email
- Confirm inbox delivery
- Check spam folder
- Confirm reply works
If you need DNS records, they are available inside your Email Settings panel.
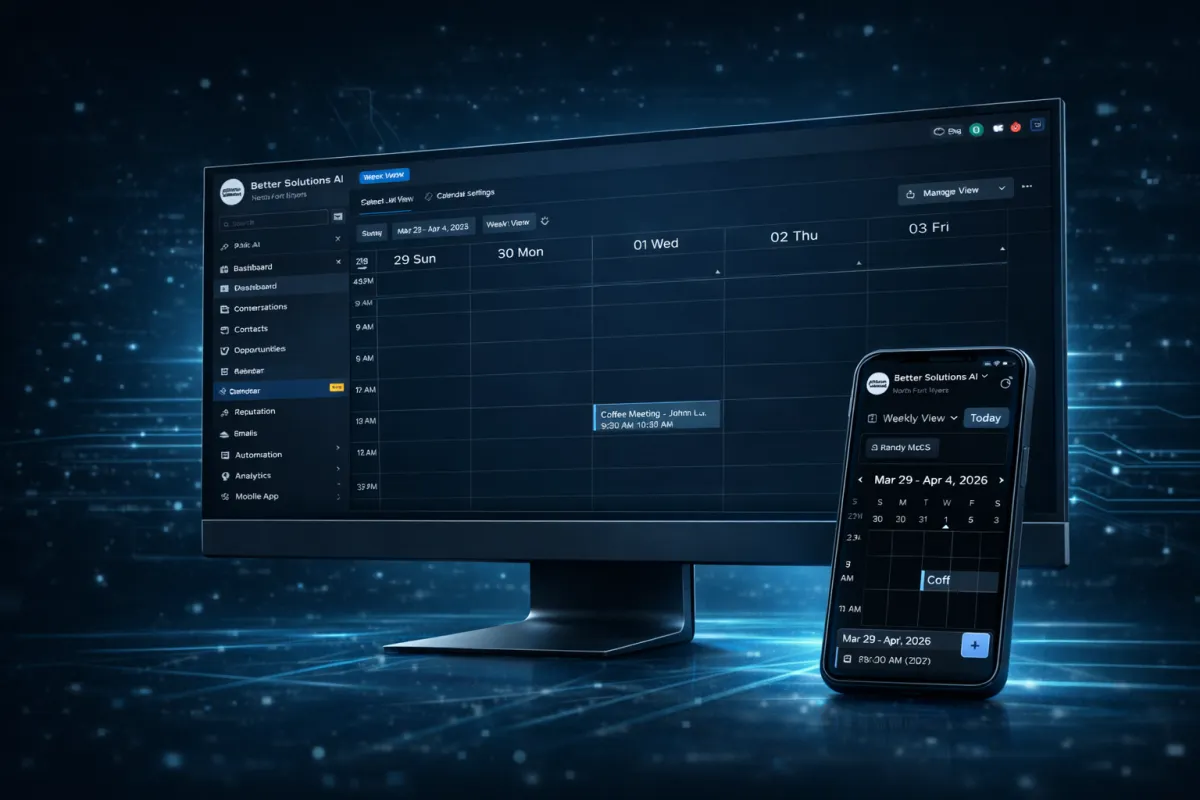
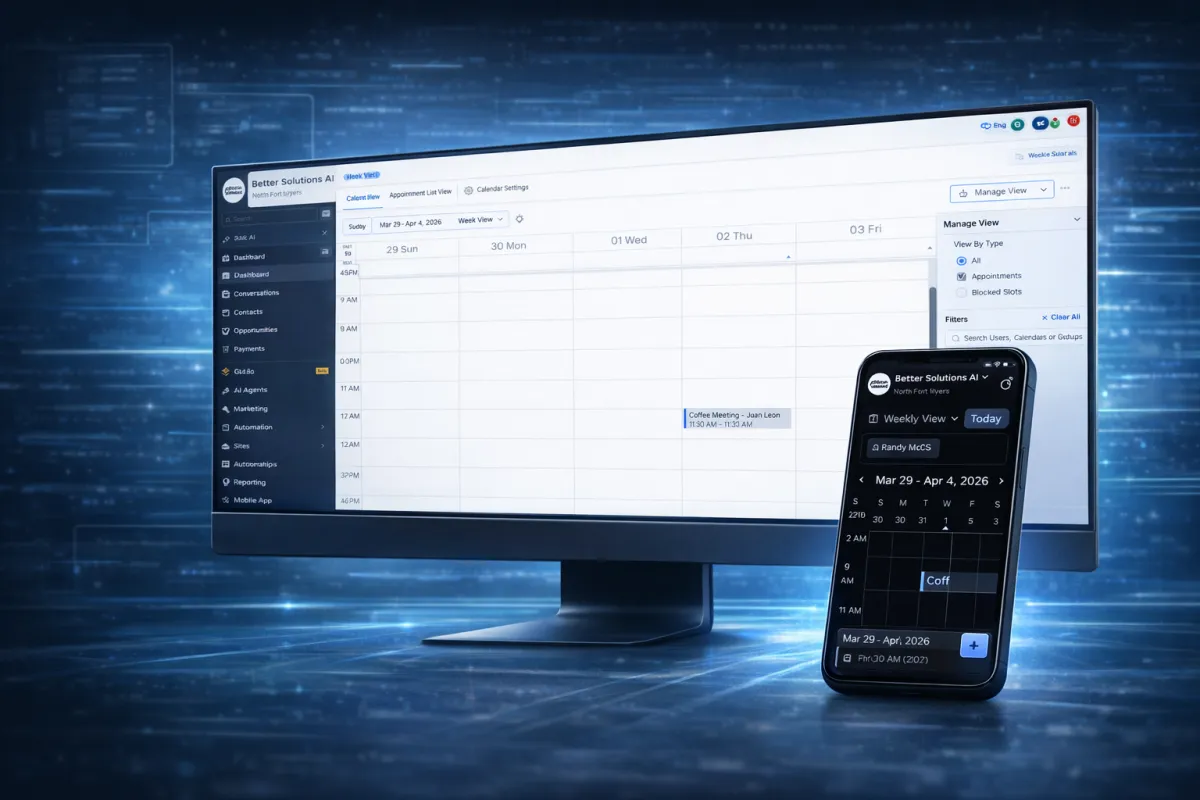
STEP 4 OVERVIEW
Calendar Connection Guide
Sync your calendar to automate appointment scheduling and maintain a single source of truth across your infrastructure.
Capability 01
Automatic Scheduling
Eliminate manual data entry and back-and-forth emails. Your system instantly processes incoming bookings and syncs them directly into your database, maintaining a single source of truth for your entire operation.
- Zero manual calendar entry
- Automated appointment reminders
Capability 02
Real-Time Availability
Prevent double-bookings with instant bi-directional synchronization. Your scheduling interface automatically reflects your current status across all connected platforms in real-time.
- Reduced scheduling conflicts
- Continuous cross-platform sync
SYSTEM VALIDATION
Calendar Connection Steps
Execute the configuration sequence to synchronize your scheduling endpoints. Once connected, validate the integration using the diagnostic checklist below to ensure automated appointments function perfectly.
01
Open Calendar Settings
Navigate to the scheduling dashboard to initiate the calendar synchronization.
02
Connect Account
Select your provider and authenticate to securely link your primary calendar.
03
Allow Permissions
Grant the system read and write access to effectively manage appointments.
04
Save Connection
Finalize the configuration to lock in your settings and activate the sync.
System Setup Complete
Your communication and scheduling tools are now connected and ready to operate.